Lykcora Studio / Ad Auction Inspector
Ad Auction Inspector tutorial
Ad Auction Inspector is a Chrome DevTools extension for ad ops, QA, and engineers who need to see which bidder won a slot, which bidders never responded, and what creative markup actually rendered.
Once the extension is installed from the Chrome Web Store, open DevTools on an ad-supported page and switch to the Ad Inspector panel to watch auctions appear live.
What the panel helps you answer
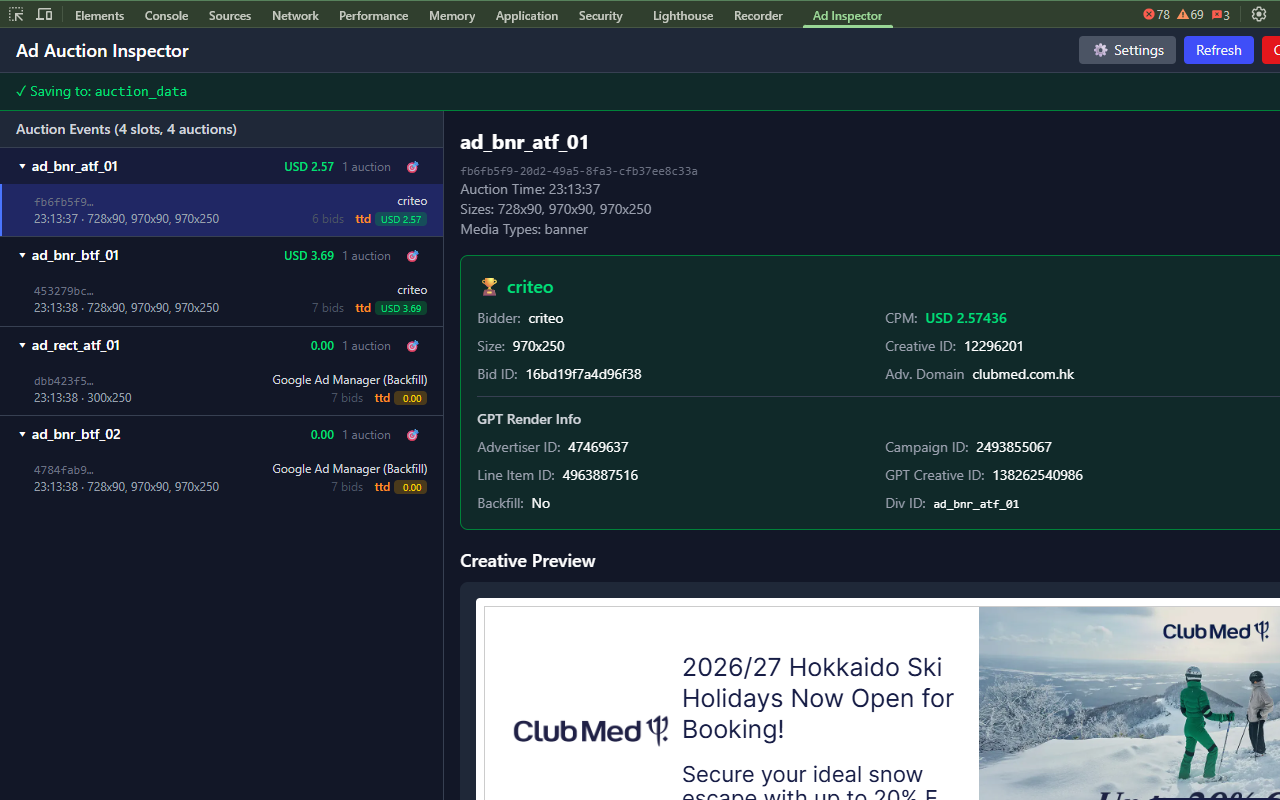
Who won the slot?
See the winning bidder, CPM, size, advertiser domain, creative IDs, and GPT render metadata in one place.
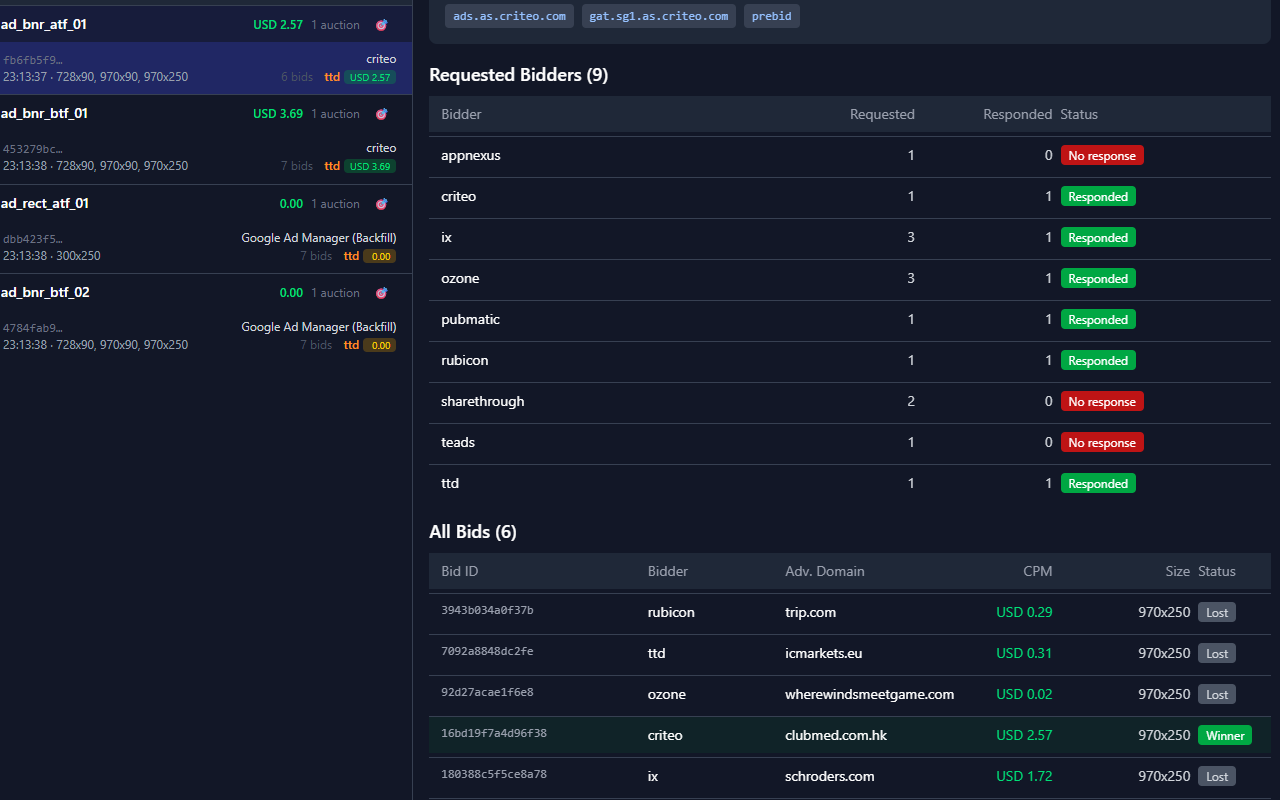
Who was invited but never responded?
The requested bidders table separates responded bidders from no-response bidders, which is useful during debugging and QA.
What creative actually rendered?
Inspect the creative preview, raw markup, and extracted domains for Prebid-rendered ads without leaving DevTools.
How should the panel behave for my workflow?
Configure storage export, highlight a bidder of interest, and add source detection rules from the settings screen.
1. Open the panel on a live page
- Open a page that runs Prebid.js and Google Publisher Tag auctions.
- Open Chrome DevTools.
- Select the Ad Inspector tab.
- If you do not see auctions immediately, refresh the inspected page and trigger the ad request again.
The panel only fills in after the current page fires auction events. An empty list usually means the page has not requested ads yet, or you opened DevTools after the auction already finished.
2. Read the live auction view
Left side: auction groups
Each slot group shows the slot code, number of recorded auctions, winning bidder, CPM badge, timestamp, sizes, and a target button that highlights the slot on the page.
Top bar and save state
Use Settings to open configuration, Refresh to request the latest data snapshot, and Clearto wipe the current tab's captured state before another test run.
If a storage directory is configured, the green banner confirms that auction data is being saved to disk.
3. Understand why a bid won
Winning bid summary
The selected auction shows the winning bidder, CPM, slot size, creative ID, bid ID, advertiser domain, and GPT metadata such as advertiser ID, campaign ID, line item, creative ID, and backfill status.
Requested vs responded bidders
The Requested Bidders table is useful when diagnosing missing bids, timeouts, or adapter behavior because it clearly labels each bidder asResponded, No response, or pending.
Below that, the All Bids table shows every bid that came back for the slot, with bidder, advertiser domain, CPM, size, and winner/lost state.
4. Inspect the creative and domains
For Prebid-rendered wins, the details panel can render a live creative preview and expose the raw ad markup underneath it. That makes it faster to verify the exact creative variant, inspect macro output, or spot third-party domains loaded by the markup.
The panel also extracts domains from the ad HTML so you can quickly see which endpoints and vendors appear in the winning creative without manually searching the markup.
GPT-rendered ads may not expose creative HTML because they are served in cross-origin SafeFrames. In that case the panel still shows the GPT render metadata, but not the raw creative.
5. Tune the settings for your workflow
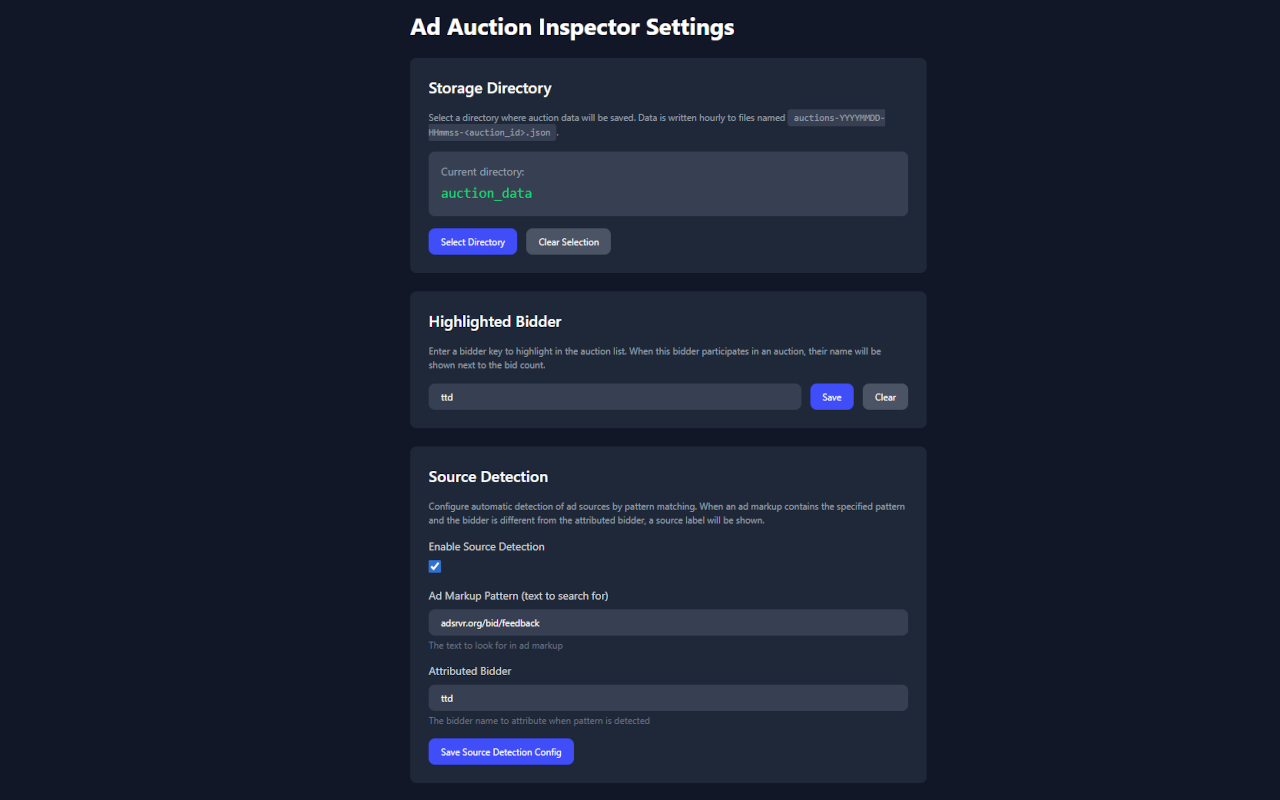
Storage Directory
Choose a directory if you want captured auction data written to disk. Without it, the panel still works, but nothing is exported.
Highlighted Bidder
Enter a bidder key such as ttd or appnexus to surface that bidder next to the bid count in the auction list.
Source Detection
Define a text pattern to search in ad markup and map it back to an attributed bidder when the rendered creative points to a specific demand source.
6. Practical notes
- Use Clear before a fresh test run if you want to isolate one page view or one refresh.
- Use the target icon in the auction list to highlight the matching slot in the page UI.
- Use Refresh if the page just finished loading and you want the latest snapshot without reopening DevTools.
- If a slot shows a Google Ad Manager direct or backfill win, CPM and creative fields may be limited compared with a Prebid win.